Maintaining a dirt bike is crucial to ensure optimal performance and longevity. One vital component that often requires attention is the carburetor. A dirty carburetor can lead to poor engine performance, reduced fuel efficiency, and even engine damage. You must know about “how to clean a dirt bike carburetor” for your bike life.
In this comprehensive guide, we will walk you through the process of cleaning a dirt bike carburetor, step by step, so you can keep your bike running smoothly and tackle any off-road adventure with confidence.
Overview of a Dirt Bike Carburetor
The carburetor is a critical component of a dirt bike’s fuel system. Its primary function is to mix air and fuel in the correct proportions and deliver it to the engine for combustion. This process ensures that the engine runs smoothly and efficiently.
However, over time, dirt, debris, and fuel residue can accumulate inside the carburetor, leading to clogs and blockages. This buildup can disrupt the fuel flow and air mixture, causing various issues such as engine sputtering, hard starting, and decreased power output.
Importance of Regular Carburetor Cleaning
Regular carburetor cleaning is essential to maintain the optimal performance of your dirt bike. By removing the accumulated dirt and debris, you can ensure that the carburetor functions efficiently, allowing for proper fuel and air mixture. A clean carburetor promotes smooth throttle response, improves fuel efficiency, and prevents engine damage. Neglecting carburetor maintenance can result in costly repairs and decreased overall performance.
Benefits of Cleaning a Dirt Bike Carburetor
Cleaning your dirt bike carburetor offers several benefits. Firstly, it restores the engine’s performance by ensuring proper fuel and air mixture, resulting in improved throttle response and power delivery. Secondly, a clean carburetor enhances fuel efficiency, allowing you to maximize your riding time without frequent refueling. Additionally, regular carburetor cleaning prolongs the lifespan of your dirt bike’s engine, reducing the risk of costly repairs and extending its overall durability.
Common Signs of a Dirty Carburetor
It’s essential to be aware of the common signs indicating that your dirt bike carburetor needs cleaning. If you notice any of the following symptoms, it’s likely time to clean your carburetor:
- Engine sputtering or stalling: A dirty carburetor can disrupt the fuel flow, causing the engine to sputter or stall during acceleration or idle.
- Hard starting: If you experience difficulty starting your dirt bike, particularly when the engine is cold, it may indicate a clogged carburetor.
- Reduced power output: A dirty carburetor can restrict the proper air and fuel mixture, leading to a decrease in power and overall performance.
- Increased fuel consumption: If you find that you need to refuel more frequently, it could be a sign of a dirty carburetor, as it hampers fuel efficiency.
- Black smoke from the exhaust: A carburetor with excessive dirt buildup can cause the engine to run rich, resulting in black smoke emitting from the exhaust.
By being vigilant and addressing these signs promptly, you can prevent further damage and ensure that your dirt bike operates at its full potential.
Preparation for Carburetor Cleaning
Before diving into the carburetor cleaning process, it’s essential to prepare adequately. Gathering the necessary tools and materials beforehand will ensure a smooth and efficient cleaning process. Here are the steps to take in preparation for cleaning your dirt bike carburetor:
Gathering Necessary Tools and Materials
To clean your dirt bike carburetor effectively, you’ll need the following tools and materials:
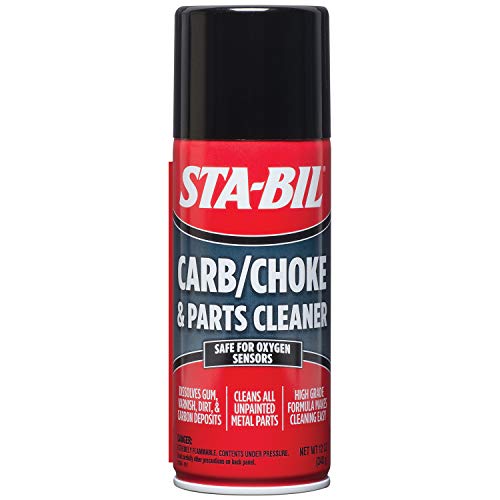
- Carburetor cleaning solution: Choose a high-quality carburetor cleaning solution designed specifically for removing dirt, grime, and varnish buildup from carburetor components.
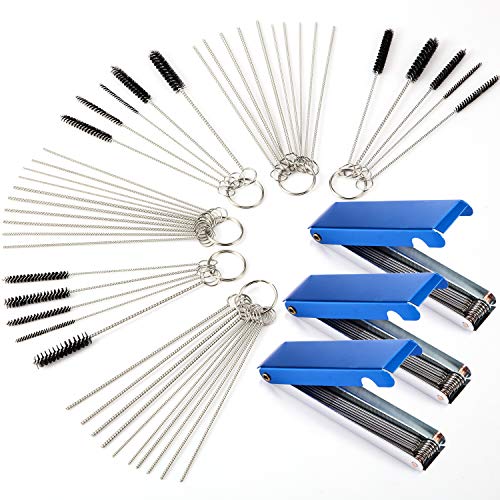
- Carburetor cleaner brush: A set of small brushes with different bristle sizes will help you clean the various components of the carburetor effectively.
- Compressed air: An air compressor or a can of compressed air will be necessary to blow out any debris or obstructions from tiny passages and jets.
- Safety goggles: Protect your eyes from any potential splashes or debris by wearing safety goggles throughout the cleaning process.
- Protective gloves: Wear gloves to shield your hands from harsh chemicals and to avoid leaving fingerprints on the cleaned carburetor components.
Identifying the Location of the Carburetor on the Dirt Bike
Before you can start cleaning the carburetor, you need to locate it on your dirt bike. The carburetor is typically positioned near the engine, mounted on the intake manifold. Consult your dirt bike’s user manual to determine the exact location of the carburetor and familiarize yourself with its components. This knowledge will help you disassemble and reassemble the carburetor correctly during the cleaning process.
Ensuring Safety Measures Are in Place
Carburetor cleaning involves working with cleaning solutions and compressed air, which can be hazardous if not handled properly. To ensure your safety, it’s crucial to take the following precautions:
- Disconnect the battery: Before removing the carburetor, disconnect the battery to prevent any accidental sparks or electrical mishaps.
- Work in a well-ventilated area: Cleaning solutions can emit fumes, so it’s essential to work in a well-ventilated space or outdoors to avoid inhaling harmful vapors.
- Keep a fire extinguisher nearby: Although rare, accidents can happen. Having a fire extinguisher nearby is a precautionary measure in case of any unexpected ignition.
- Avoid smoking or open flames: Carburetor cleaning involves flammable substances, so it’s crucial to avoid smoking or having any open flames nearby.
Removing the Carburetor from the Dirt Bike
With the necessary tools and safety measures in place, it’s time to remove the carburetor from the dirt bike. Follow these steps:
- Consult the user manual: Refer to your dirt bike’s user manual for specific instructions on removing the carburetor. Different dirt bike models may have varying procedures.
- Empty the fuel tank: Before removing the carburetor, drain the fuel tank completely to minimize the risk of fuel spills and contamination.
- Disconnect fuel lines: Carefully disconnect the fuel lines from the carburetor, remembering to place a container underneath to catch any residual fuel.
- Remove the air filter and intake manifold: Depending on your dirt bike model, you may need to remove the air filter and intake manifold to access the carburetor.
- Unscrew the carburetor mounting bolts: Use the appropriate tools to loosen and remove the mounting bolts that hold the carburetor in place.
- Gently remove the carburetor: Once the mounting bolts are removed, carefully detach the carburetor from the intake manifold and throttle cables.
By following these steps, you can safely and effectively remove the carburetor from your dirt bike, preparing it for thorough cleaning. Remember to keep track of the screws and bolts you remove, as they will need to be reinstalled correctly later. In the next section, we will dive into the disassembly process of the carburetor to clean each component thoroughly.
Disassembling the Carburetor
To effectively clean a dirt bike carburetor, you need to disassemble it. This process allows you to access and clean each component thoroughly. Follow the steps below to disassemble the carburetor:
Removing the Float Bowl and Cleaning It
The float bowl is a crucial part of the carburetor that houses the float and needle assembly. It’s responsible for regulating the fuel level in the carburetor. To remove and clean the float bowl:
- Locate the float bowl: The float bowl is typically located at the bottom of the carburetor and is held in place by screws.
- Loosen the screws: Using the appropriate screwdriver, carefully loosen and remove the screws securing the float bowl. Be cautious not to damage the gasket.
- Remove the float bowl: Gently lift the float bowl off the carburetor body, taking care not to spill any fuel.
- Inspect and clean the float bowl: Examine the float bowl for any dirt, debris, or varnish buildup. Use a carburetor cleaning solution and a brush to clean the bowl thoroughly. Pay attention to the fuel inlet and drain holes, ensuring they are clear and unobstructed.
Cleaning the Idle and Main Jets
The idle and main jets are responsible for controlling the fuel flow at different engine speeds. Over time, these jets can become clogged, leading to poor engine performance. To clean the jets:
- Locate the idle and main jets: The idle jet is typically located near the bottom of the carburetor, while the main jet is situated in the main body of the carburetor.
- Remove the jets: Using a small flat-head screwdriver, carefully unscrew and remove the idle and main jets from their respective positions.
- Clean the jets: Inspect the jets for any dirt or debris and clean them using the carburetor cleaning solution and a small brush. Pay close attention to the small orifices to ensure they are clear and free from any blockages.
Removing and Cleaning the Needle and Seat
The needle and seat work together to regulate the flow of fuel into the carburetor. To remove and clean these components:
- Locate the needle and seat: The needle is attached to the float, while the seat is positioned within the carburetor body.
- Remove the needle: Carefully detach the needle from the float assembly, taking note of its position and orientation.
- Inspect and clean the needle: Examine the needle for any dirt or varnish buildup. If necessary, soak it in the carburetor cleaning solution to dissolve any stubborn residue. Use a brush to remove any remaining debris.
- Remove the seat: Using a small flat-head screwdriver or a specialized seat removal tool, gently pry out the seat from its position in the carburetor body.
- Clean the seat: Inspect the seat for any dirt or debris. If needed, clean it with the carburetor cleaning solution and a brush, ensuring all passages are clear.
Cleaning the Emulsion Tube and Air/Fuel Mixture Screw
The emulsion tube and air/fuel mixture screw are responsible for blending the fuel and air in the carburetor. To clean these components:
- Locate the emulsion tube and air/fuel mixture screw: The emulsion tube is a long tube-like component situated in the main body of the carburetor, while the air/fuel mixture screw is typically located on the side of the carburetor.
- Remove the emulsion tube: Carefully unscrew and remove the emulsion tube from the carburetor body. Take note of its position and orientation for reassembly.
- Clean the emulsion tube: Inspect the emulsion tube for any dirt, varnish, or residue. Use the carburetor cleaning solution and a brush to clean it thoroughly, ensuring all passages are clear.
- Clean the air/fuel mixture screw: Gently unscrew the air/fuel mixture screw from its position. Clean it using the carburetor cleaning solution and a brush, paying attention to the small orifices and threads.
Inspecting and Cleaning the Throttle Slide and Diaphragm
The throttle slide and diaphragm play a crucial role in controlling the airflow and fuel mixture in the carburetor. To inspect and clean these components:
- Remove the throttle slide: Carefully remove the throttle slide from the carburetor body, ensuring you don’t damage the diaphragm.
- Inspect the throttle slide and diaphragm: Examine the throttle slide and diaphragm for any tears, cracks, or damage. If you notice any issues, it’s advisable to replace them.
- Clean the throttle slide and diaphragm: If the throttle slide and diaphragm are in good condition, clean them using a mild detergent and water solution. Gently scrub away any dirt or residue, then rinse and dry them thoroughly before reassembling.
By following these steps, you can disassemble the carburetor and clean each component thoroughly. In the next section, we will delve into the process of cleaning the carburetor components to ensure optimal performance.
Cleaning the Carburetor Components
Once you have disassembled the carburetor, it’s time to clean each component thoroughly. This step is crucial for removing any dirt, debris, or varnish buildup that may be obstructing the fuel and air passages. Follow the steps below to clean the carburetor components effectively:
Soaking the Carburetor Parts in a Cleaning Solution
Begin by preparing a container of carburetor cleaning solution. This solution is specifically designed to break down and dissolve the dirt, grime, and varnish that have accumulated on the carburetor components. Follow the instructions provided with the cleaning solution for the appropriate mixture ratio.
- Place the disassembled carburetor parts into the container of cleaning solution. Ensure that all parts are fully submerged.
- Allow the parts to soak in the cleaning solution for the recommended duration. This typically ranges from 15 minutes to several hours, depending on the severity of the buildup.
- During the soaking process, agitate the parts gently with a brush or by swirling the container to help dislodge and dissolve the stubborn residue.
Soaking the carburetor parts in the cleaning solution will help soften and loosen the dirt and varnish, making it easier to remove during the cleaning process.
Using a Carburetor Cleaning Brush to Remove Dirt and Debris
Once the parts have finished soaking, it’s time to remove the loosened dirt and debris. A carburetor cleaning brush with different bristle sizes will come in handy for this task. Follow these steps:
- Take each part out of the cleaning solution, one at a time, and inspect it for any remaining dirt or residue.
- Use the appropriate size brush to scrub away any stubborn buildup, paying close attention to the small passages, jets, and orifices.
- Dip the brush in the cleaning solution periodically to ensure effective cleaning and to prevent the reintroduction of dirt onto the parts.
Be thorough in your cleaning, ensuring that all components are free from any dirt or debris. Take your time and be patient, as this step is crucial for restoring the functionality of the carburetor.
Utilizing Compressed Air to Blow out Clogged Passages
After using the cleaning brush, it’s time to ensure that all passages and jets are clear from any remaining debris. Compressed air is an excellent tool for this task, as it can effectively blow out any clogs and obstructions. Follow these steps:
- Set up your compressor or grab a can of compressed air designed for cleaning purposes.
- Position the carburetor components in a way that allows you to access the passages and jets easily.
- Use the compressed air to blow air through each passage and jet, ensuring that there is a clear flow and no obstructions.
Pay special attention to the tiny orifices and jets, as these are particularly prone to clogging. The force of the compressed air should dislodge any remaining debris, allowing for unrestricted fuel and air flow.
Inspecting and Replacing Damaged or Worn-Out Parts
While cleaning the carburetor components, it’s essential to inspect them for any signs of damage or wear. Components such as gaskets, seals, and diaphragms may deteriorate over time and require replacement. Look for any tears, cracks, or deformities that may compromise the functionality of the carburetor.
- Inspect each component carefully, checking for any visible signs of damage or wear.
- If you identify any damaged or worn-out parts, consult your dirt bike’s manufacturer or a reputable dealer to obtain the necessary replacement parts.
- Install the new parts according to the manufacturer’s instructions, ensuring proper alignment and sealing.
Replacing damaged or worn-out parts is crucial for maintaining the overall functionality of the carburetor and ensuring optimal performance.
Reassembling the Carburetor
Once you have cleaned and inspected all the carburetor components, it’s time to reassemble the carburetor. Follow these steps for a smooth reassembly process:
- Refer to your dirt bike’s user manual or any reference materials for the correct order and orientation of the components.
- Begin by reinstalling the throttle slide and diaphragm, ensuring they are properly seated.
- Reattach the needle and seat, taking care to align them correctly and secure them in place.
- Position the main and idle jets back into their respective locations, screwing them in until they are snug.
- Carefully place the float bowl back onto the carburetor body, aligning it with the gasket and securing it with the screws.
Ensure that all screws and bolts are tightened to the manufacturer’s specifications, but avoid overtightening, as it may damage the components.
By following these steps, you can effectively clean the carburetor components, removing any dirt, debris, and varnish buildup. In the next section, we will discuss the process of reinstalling and testing the carburetor on your dirt bike.
Reinstalling and Testing the Carburetor
After thoroughly cleaning the carburetor components, it’s time to reinstall the carburetor onto your dirt bike. This section will guide you through the reinstallation process and provide steps for testing the carburetor’s functionality.
Properly Reinstalling the Carburetor on the Dirt Bike
Follow these steps to ensure the correct and secure reinstallation of the carburetor onto your dirt bike:
- Refer to your dirt bike’s user manual or any reference materials for specific instructions on reinstalling the carburetor. Different dirt bike models may have varying procedures.
- Position the carburetor in place, aligning it with the intake manifold and throttle cables.
- Carefully insert the mounting bolts through the appropriate holes and tighten them securely. Ensure that the carburetor is seated properly and that there are no gaps or misalignments.
- Reconnect the fuel lines to the carburetor, ensuring a secure and leak-free connection.
- If you removed the air filter and intake manifold during the disassembly process, reinstall them properly, following the manufacturer’s instructions.
- Double-check that all connections, bolts, and screws are tightened to the manufacturer’s specifications, but be careful not to overtighten, as it may damage the carburetor or other components.
By following these steps, you can reinstall the carburetor onto your dirt bike, ensuring a secure and proper fit.
Adjusting the Idle and Air/Fuel Mixture Settings
Once the carburetor is reinstalled, it’s essential to adjust the idle and air/fuel mixture settings. These adjustments ensure that the engine runs smoothly and efficiently. Follow these steps to make the necessary adjustments:
- Start by locating the idle adjustment screw and the air/fuel mixture screw on the carburetor. Refer to your dirt bike’s user manual or any reference materials for their specific locations.
- Start the engine and let it warm up to its normal operating temperature.
- Adjusting the idle: Turn the idle adjustment screw clockwise to increase the idle speed or counterclockwise to decrease it. Aim for a stable and smooth idle speed.
- Adjusting the air/fuel mixture: Slowly turn the air/fuel mixture screw clockwise until it lightly seats, then turn it counterclockwise according to the manufacturer’s specifications. Fine-tune the screw to achieve the optimal air/fuel mixture for your specific dirt bike model.
It’s important to note that the exact idle and air/fuel mixture settings may vary depending on your dirt bike’s make and model. Consult the user manual or seek guidance from a qualified mechanic if you’re unsure about the correct settings.
Conducting a Thorough Carburetor Function Test
After adjusting the idle and air/fuel mixture settings, it’s time to conduct a comprehensive carburetor function test. This test will help ensure that the carburetor is functioning correctly and that your dirt bike is ready for action. Follow these steps to perform the test:
- Start the engine and let it idle for a few minutes to stabilize.
- Gradually increase the throttle and observe the engine’s response. Ensure that the throttle response is smooth and without any hesitation or stumbling.
- Test the engine at various RPM ranges, from low to high, to check for any irregularities or issues. Pay attention to the engine’s power delivery and responsiveness.
- Monitor the exhaust for any abnormal smoke or excessive emissions, which may indicate an incorrect air/fuel mixture.
- Take your dirt bike for a short ride, paying attention to any changes in engine performance, fuel consumption, or unusual noises.
If you notice any issues during the carburetor function test, consult your dirt bike’s user manual or seek assistance from a qualified mechanic. They can help diagnose and resolve any problems that arise.
Troubleshooting Common Carburetor Issues
Even with proper cleaning and maintenance, carburetor issues can still occur. Here are some common problems and troubleshooting tips:
- Clogged jets or passages: If you experience poor engine performance or sputtering, it may indicate clogged jets or passages. Revisit the cleaning process to ensure that all components are thoroughly cleaned and free from blockages.
- Incorrect idle or air/fuel mixture: If you’re having difficulty achieving a stable idle or optimal air/fuel mixture, double-check the adjustment settings. Refer to the user manual or seek professional assistance to ensure proper adjustment.
- Fuel leaks: If you notice fuel leaks around the carburetor, check the connections and seals. Replace any damaged or worn-out parts, such as gaskets or O-rings, to eliminate the leaks.
- Damaged diaphragm or seals: If there are issues with the throttle response or erratic engine performance, inspect the diaphragm and seals for any damage or wear. Replace them if necessary.
By troubleshooting and addressing these common carburetor issues, you can ensure that your dirt bike continues to operate smoothly and efficiently.
In the next section, we will provide you with valuable maintenance tips to prevent future carburetor problems and keep your dirt bike running at its best.
Maintenance Tips to Prevent Future Carburetor Problems
Cleaning a dirt bike carburetor is not a one-time task; it’s an ongoing process to keep your carburetor in prime condition. Regular maintenance and preventive measures will help prevent future carburetor problems and ensure optimal performance. Here are some essential maintenance tips to follow:
1. Use High-Quality Fuel
Using high-quality fuel is crucial for maintaining a clean carburetor. Avoid using old or contaminated fuel, as it can leave residue and deposits in the carburetor. Opt for high-octane fuel with minimal ethanol content to minimize the risk of fuel-related issues.
2. Keep the Fuel System Clean
To avoid debris and contaminants from entering the carburetor, it’s important to keep the fuel system clean. Use a fuel filter to trap any dirt or particles before they reach the carburetor. Regularly inspect and replace the fuel filter as recommended by the manufacturer.
3. Perform Regular Carburetor Inspections
Periodic inspections of the carburetor can help identify any potential issues before they escalate. Check for signs of dirt, debris, or varnish buildup on the carburetor components. If you notice any abnormalities, such as clogged jets or deteriorated seals, address them promptly.
4. Follow the Manufacturer’s Maintenance Schedule
Refer to your dirt bike’s user manual for the manufacturer’s recommended maintenance schedule. Adhere to the specified intervals for carburetor cleaning and other maintenance tasks. Following the prescribed maintenance schedule will help keep your dirt bike in optimal condition.
5. Store the Dirt Bike Properly
Proper storage of your dirt bike can prevent carburetor problems caused by stale fuel or moisture accumulation. Follow these steps for storing your dirt bike:
- Drain the fuel from the tank and carburetor before long-term storage to prevent fuel deterioration.
- Use a fuel stabilizer to prevent fuel degradation during storage.
- Store the dirt bike in a dry and well-ventilated area to minimize moisture buildup.
- Cover the bike with a breathable cover to protect it from dust and debris.
6. Regularly Clean and Maintain the Air Filter
A clean air filter is essential for proper carburetor function. Regularly clean and maintain the air filter according to the manufacturer’s recommendations. A clogged or dirty air filter can restrict airflow, affecting the fuel and air mixture in the carburetor.
7. Avoid Excessive Idling
Excessive idling can lead to fuel residue buildup in the carburetor. Minimize idling time and avoid prolonged periods of idling to prevent deposits from forming. Instead, allow the engine to warm up briefly before riding.
8. Seek Professional Assistance if Needed
If you encounter persistent carburetor problems or are unsure about any maintenance procedures, it’s advisable to seek professional assistance. A qualified mechanic or dirt bike specialist can provide expert guidance and ensure that your carburetor receives the necessary care.
By following these maintenance tips, you can prevent future carburetor problems and keep your dirt bike running smoothly. Regular cleaning, inspection, and adherence to the manufacturer’s recommendations will help maintain the performance and longevity of your carburetor.